Configure Zendesk SSO with Access for SaaS
This tutorial covers how to configure Zendesk SSO with Access for SaaS.
⏲️ Time to complete:
20 minutes
Configure Zendesk and Cloudflare
-
To begin, navigate to your Zendesk administrator dashboard, typically available at
<yourdomain>.zendesk.com/admin/security/sso. -
In a separate tab or window, open the Zero Trust Dashboard and navigate to Access > Applications.
-
Select SaaS as the application type to begin creating a SaaS application.
-
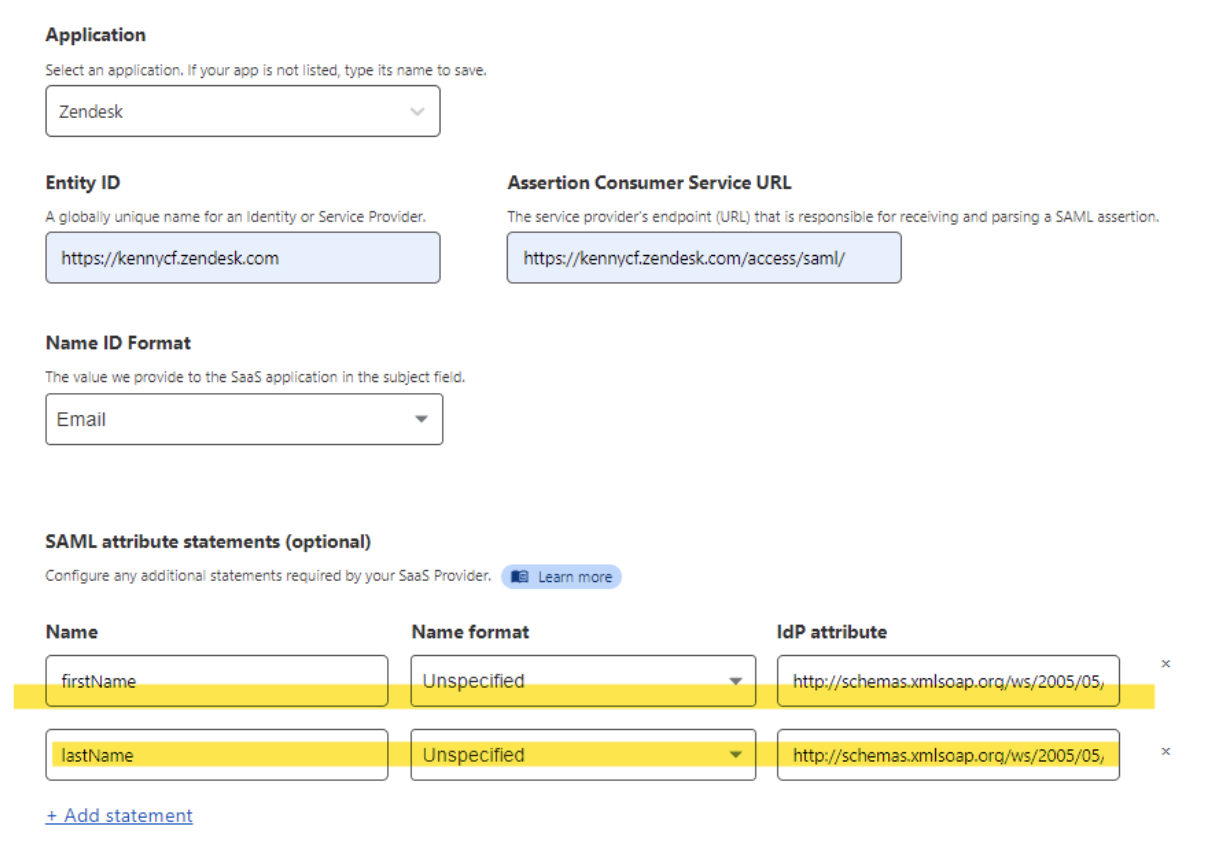
Copy the following fields from your Zendesk account and input them in the Zero Trust application configuration:
- Assertion Consumer Service URL. This URL appears as
SAML SSO URLin your Zendesk account. - Entity ID:
https://yoursubdomain.zendesk.com - NameID: Email
- Assertion Consumer Service URL. This URL appears as
-
Configure these Attribute Statements to include a user’s first and last name:
<Cloudflare Firstname attribute name>=>http://schemas.xmlsoap.org/ws/2005/05/identity/claims/givenname<Cloudflare Last name attribute name>=>http://schemas.xmlsoap.org/ws/2005/05/identity/claims/surname
-
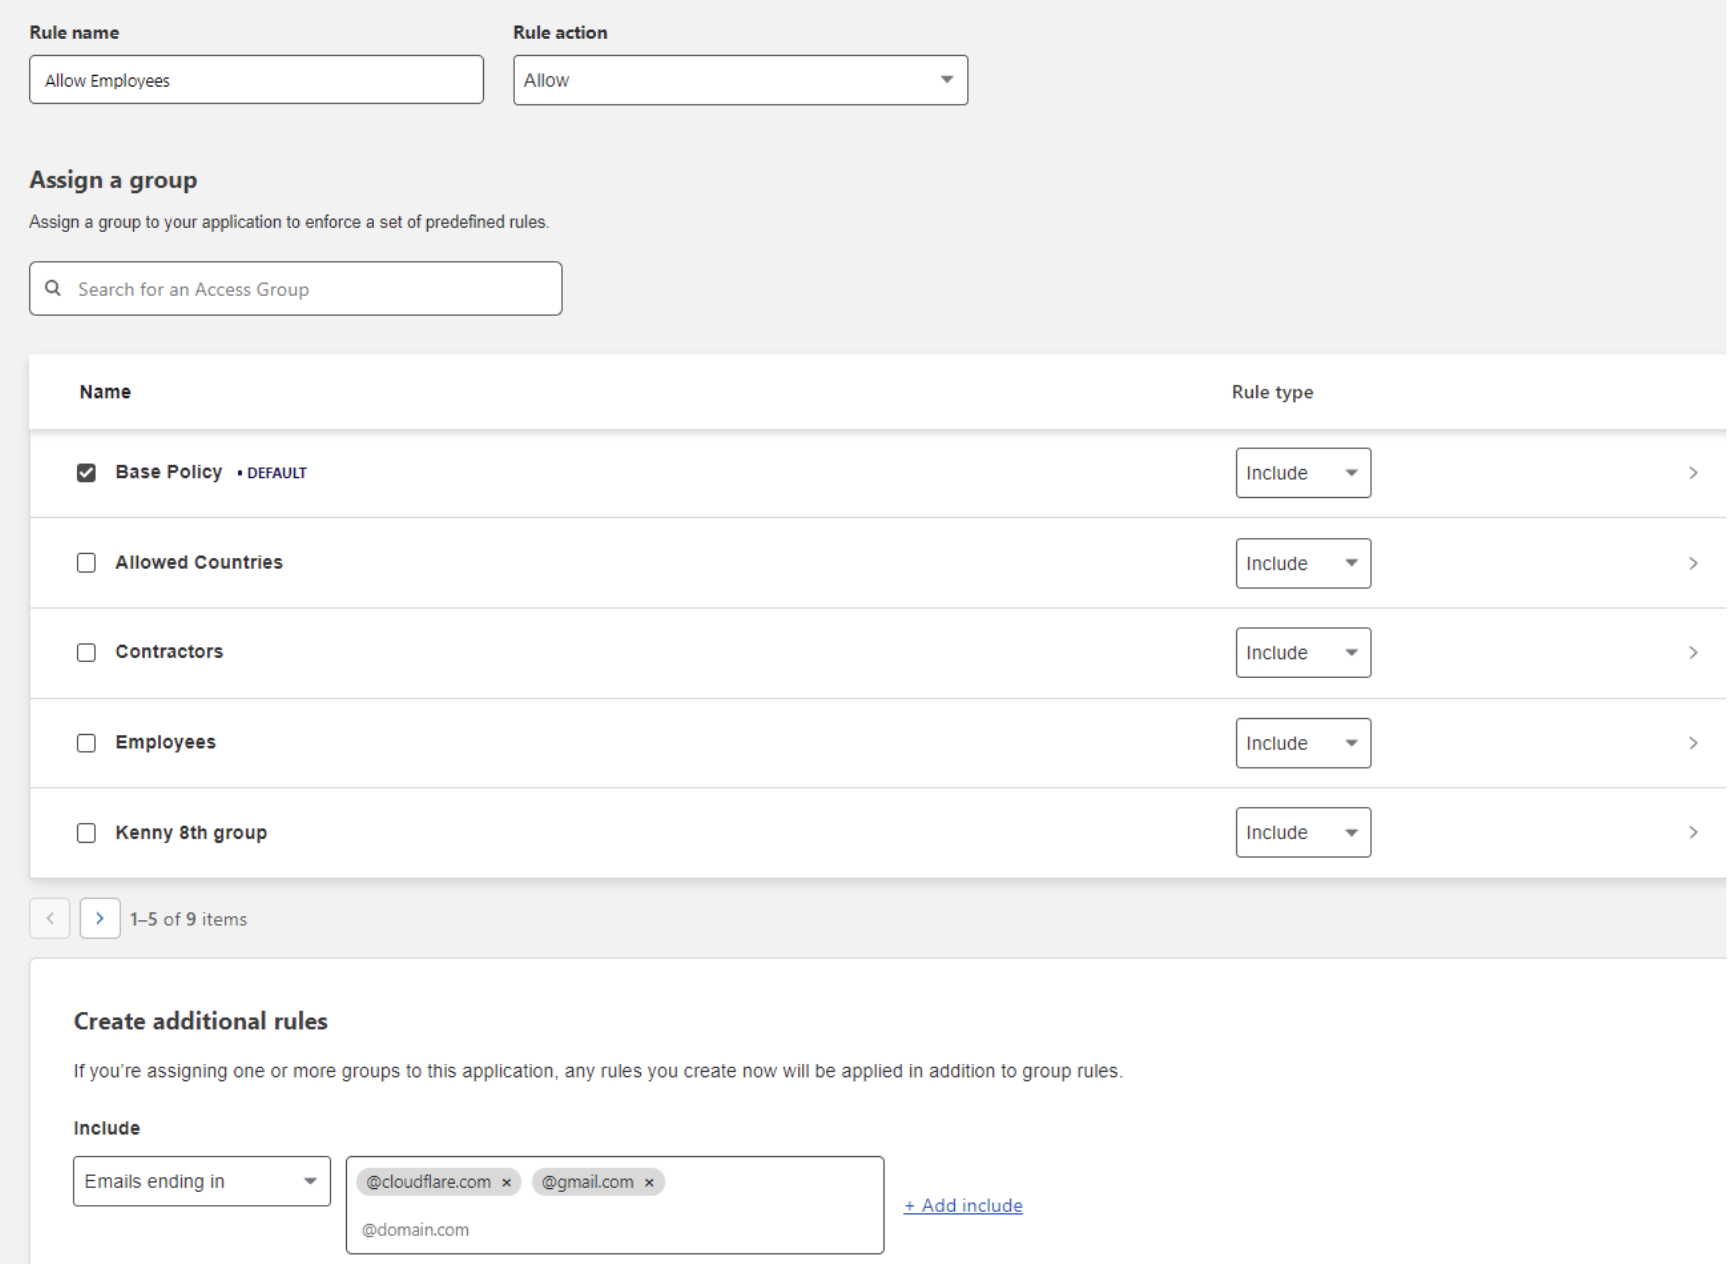
Create an Access policy to determine who can access Zendesk.
-
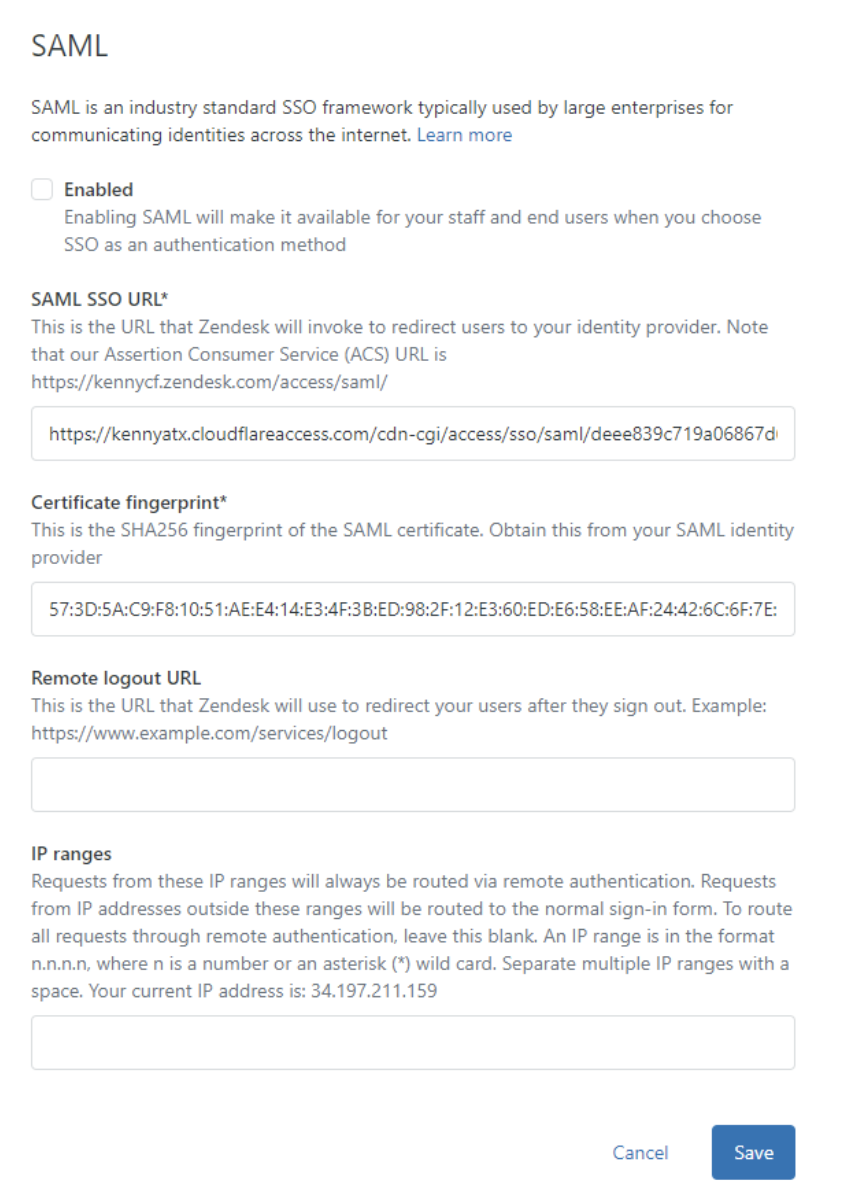
Copy the Cloudflare IdP values and add them to the following Zendesk Fields:
- SSO Endpoint => SAML SSO URL
- Public Key => Certificate Fingerprint
-
Go to
https://<yourdomain>.zendesk.com/admin/security/staff_membersand enable External Authentication > Single Sign On.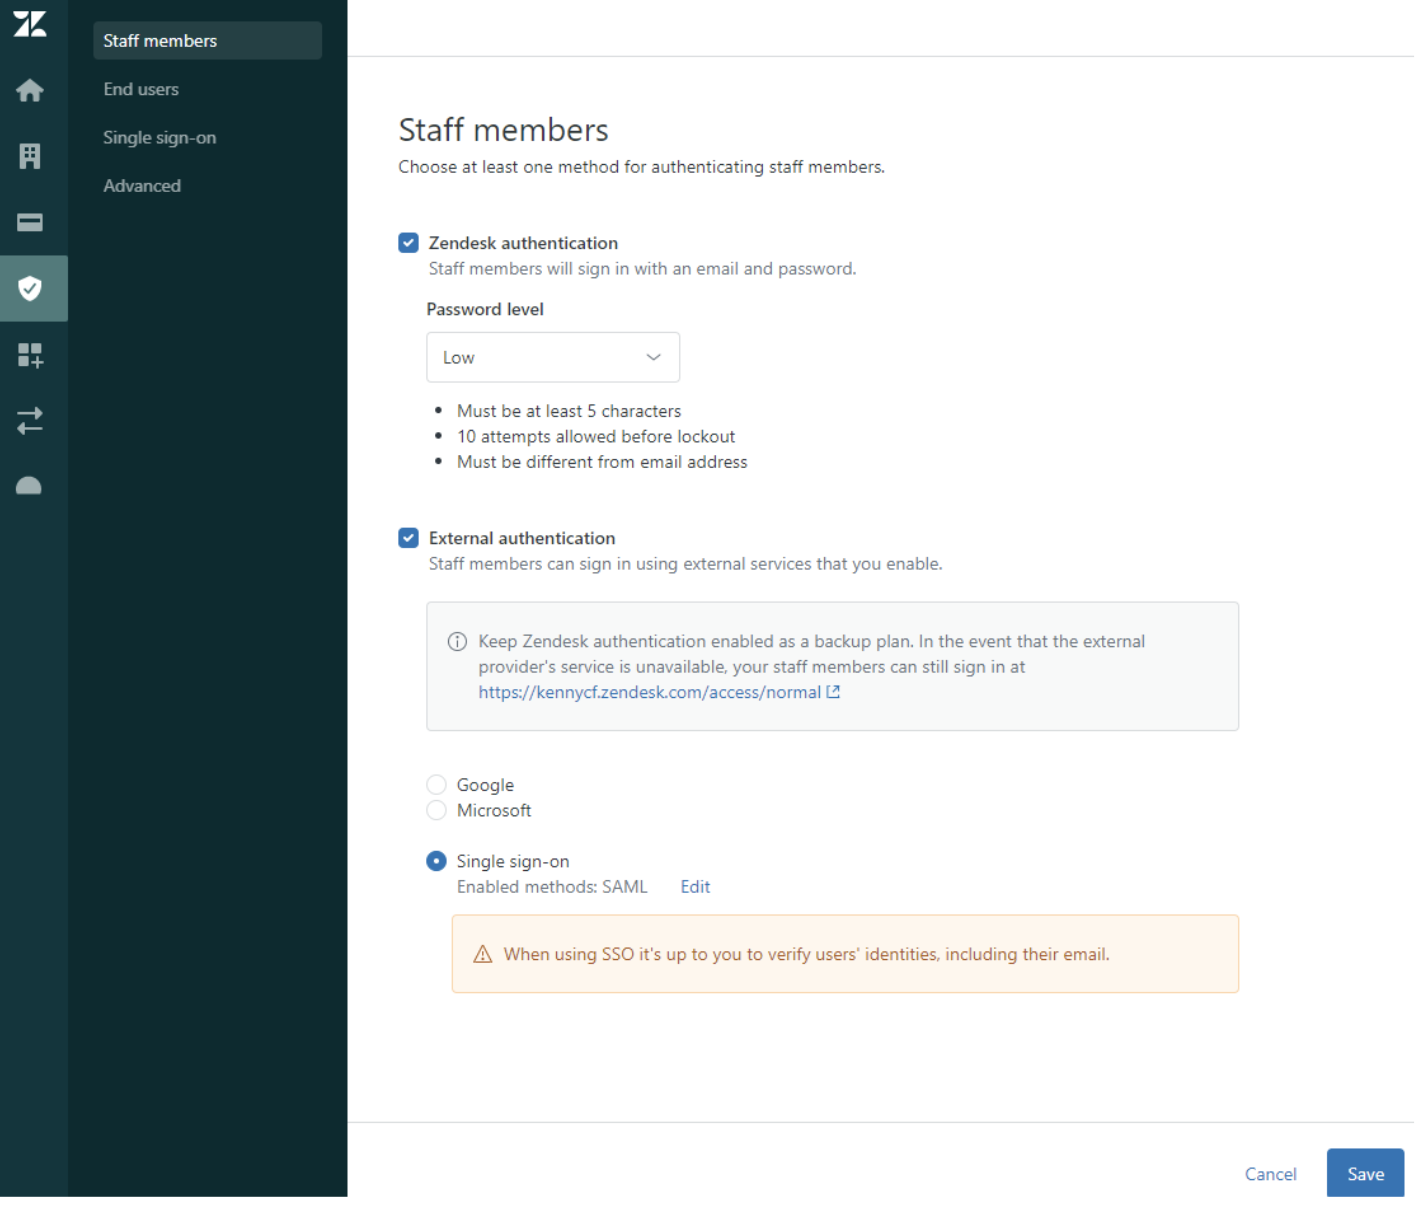
Users should now be able to log into Zendesk if their Email address exists in the Zendesk user list.